How to Replace Damaged WPC Panel Effectively?
Replacing damaged WPC panels is a task many homeowners may face. Weather conditions, accidents, or inadequate installation can lead to damage over time. Knowing how to effectively Replace Damaged Wpc Panel is essential to maintain the aesthetic and functionality of your space.
WPC, or Wood Plastic Composite, combines the best features of wood and plastic. This material is not only durable but also eco-friendly. However, even the best materials can succumb to wear and tear. Recognizing the signs of damage early can save time and costs. A missing corner or faded surface can indicate the need for replacement.
When you consider how to replace damaged WPC panel, preparation is key. Gathering the right tools and materials is vital for a successful replacement. Understanding the replacement process can also minimize potential mistakes. Even seasoned DIYers can overlook crucial steps. A well-planned approach will lead to a more satisfying and professional finish.
Understanding WPC Panels: Composition and Common Damage Types
WPC panels, or wood-plastic composites, blend wood fibers and plastic. This composition offers durability and versatility. However, common damage includes scratches, fading, and warping. Understanding these issues is crucial for effective replacement.
Scratches may result from heavy furniture or outdoor debris. They can diminish the panel's aesthetic appeal. Faded colors can occur due to prolonged exposure to sunlight. Warping often happens in areas with poor drainage or excessive moisture. Each type of damage requires a tailored approach to repair or replace the panel effectively.
When replacing a damaged WPC panel, inspect the surrounding panels. Misalignment can happen if new panels differ slightly in size. Choose a panel that closely matches the original for a seamless look. Sometimes, it’s hard to find an exact match. In such cases, consider how the new panel might integrate with the existing ones.
Assessing Damage: When to Replace Your WPC Panels
Assessing damage to WPC (Wood Plastic Composite) panels is crucial for maintaining both aesthetic appeal and structural integrity. Signs of damage can vary from surface scratches and fading to significant warping or cracks. According to a report from the Composite Panel Association, 40% of WPC panel failures are due to improper installation or environmental factors. This underscores the importance of a thorough inspection.
When evaluating WPC panels, look for noticeable discoloration or surface damage. Often, a change in color indicates UV degradation. Cracks and splits can occur due to moisture exposure or extreme temperature shifts, which can escalate quickly if not addressed. The National Association of Home Builders states that homes with damaged siding can lose up to 10% of market value. Regular assessments are recommended every six months to avoid costly replacements.
Ignoring minor issues can result in larger problems down the line. The materials may seem durable, but unaddressed damage can lead to structural weaknesses. Replacing panels at the first signs of trouble is often more cost-effective in the long run. Regular maintenance and timely action can extend the lifespan of WPC panels significantly.
Step-by-Step Guide to Removing Damaged WPC Panels Safely
Removing damaged WPC (Wood-Plastic Composite) panels can seem challenging, but with the right approach, it becomes manageable. Start by gathering necessary tools. You’ll need safety goggles, a pry bar, a hammer, and a utility knife. Always prioritize safety first.
When you're ready, carefully examine the damaged panel's edges. Identify how it’s attached to surrounding panels. Insert the pry bar gently. Apply consistent pressure to avoid cracking nearby panels. Try to loosen one end first. This helps in easily removing the entire panel. Be patient; rushing can lead to more damage.
Tips: Take photos of the panel installation before removal. This helps when you reinstall new panels. If nails or screws are visible, use the utility knife to cut around them. Make sure to dispose of the damaged material responsibly.
Handling WPC isn't always straightforward. Mistakes can happen, like breaking adjacent panels. Keep an eye on your work and reflect on what could improve your technique. Seek guidance if needed; asking for tips from others can enhance your skill.
WPC Panel Replacement Process Steps
Selecting Replacement Panels: Key Specifications and Recommendations
When it comes to selecting replacement WPC (Wood Plastic Composite) panels, a few key specifications should guide your purchasing decisions. Understanding the composition of these panels is crucial. A detailed report from the Composite Panel Association indicates that panels with at least 50% wood fiber deliver excellent durability. Additionally, a higher percentage of recycled materials not only aids sustainability but can enhance performance.
Another essential factor is the thickness and density of the panels. Panels should be at least 20mm thick for optimal stability. A recent study highlighted that density impacts the longevity of WPC panels. Higher density panels tend to resist deformation and moisture absorption better, making them ideal for outdoor applications. Be cautious; not all manufacturers provide transparency in their specifications, leading to potential mismatches in expected performance.
Color and texture matter too. These aesthetic features affect how well the panel integrates with existing structures. While a natural wood appearance is often preferred, it's worth noting that a uniform color might reveal wear patterns more readily. A report by the International WPC Council notes that consumers are seeking panels with UV-protection coatings to minimize fading. However, not all finish types offer the same level of protection. Hence, careful research and comparisons are critical in enhancing your project's success.
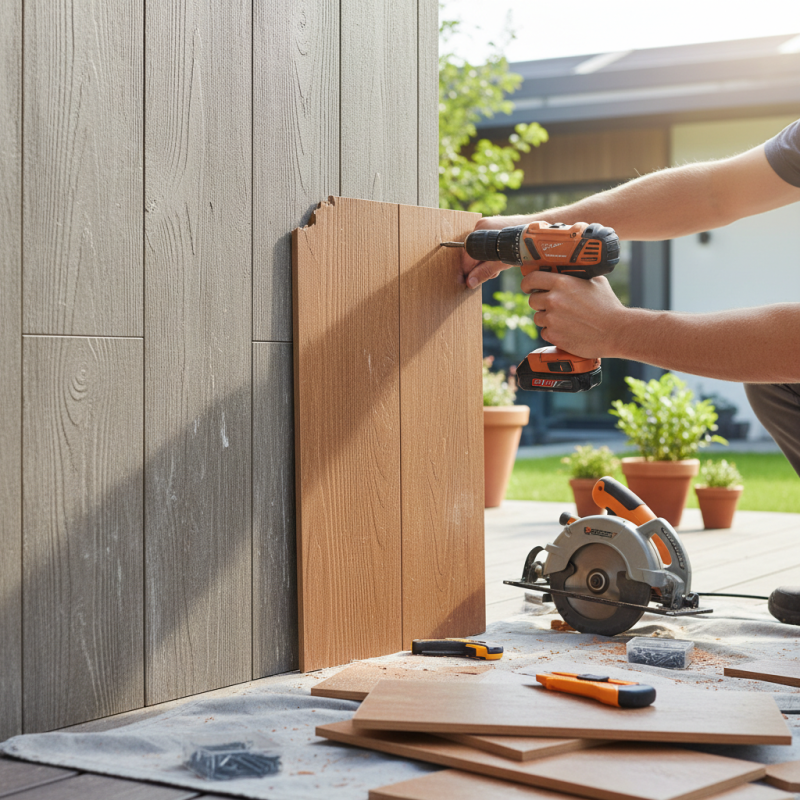
Installation Process: Fitting New WPC Panels Effectively and Securely
Replacing damaged WPC (Wood Plastic Composite) panels can significantly enhance the aesthetics and durability of outdoor spaces. To install new WPC panels effectively, it’s vital to understand the installation process. Begin by assessing the area; ensure it is clean and dry. Experts recommend measuring twice to avoid miscuts. The ideal temperature for installation should be between 50°F and 90°F. These conditions prevent warping and ensure proper fitting.
When fitting the new panels, align them with existing structures. Use appropriate fasteners; stainless steel or corrosion-resistant options are optimal. Industry data shows that improper fastening can lead to delamination, which occurs in about 10% of poorly installed panels. Pay careful attention to spacing; too tight can cause buckling. It’s common for DIYers to underestimate the need for precision. Realigning panels after installation can be challenging.
Sealing the edges can prevent moisture intrusion, crucial in high-humidity areas. Research indicates that moisture-related damage accounts for 20% of panel failures in outdoor installations. Reflecting on the process, it’s easy to overlook small details. Each step of the installation must be revisited for quality assurance to ensure long-lasting performance of your newly installed WPC panels.
How to Replace Damaged WPC Panel Effectively?
| Step | Action | Tools Required | Estimated Time |
| 1 | Assess the Damage | None | 15 mins |
| 2 | Remove Damaged Panel | Screwdriver, Pry Bar | 30 mins |
| 3 | Prepare New Panel for Installation | Measuring Tape, Cutting Tool | 45 mins |
| 4 | Install New Panel | Drill, Screws | 1 hour |
| 5 | Finishing Touches | Sealant, Paint (optional) | 30 mins |